Sign in with Apple is commonly used by modern apps now, this article will introduce a way to implement it with Flutter for iOS apps.
Intro
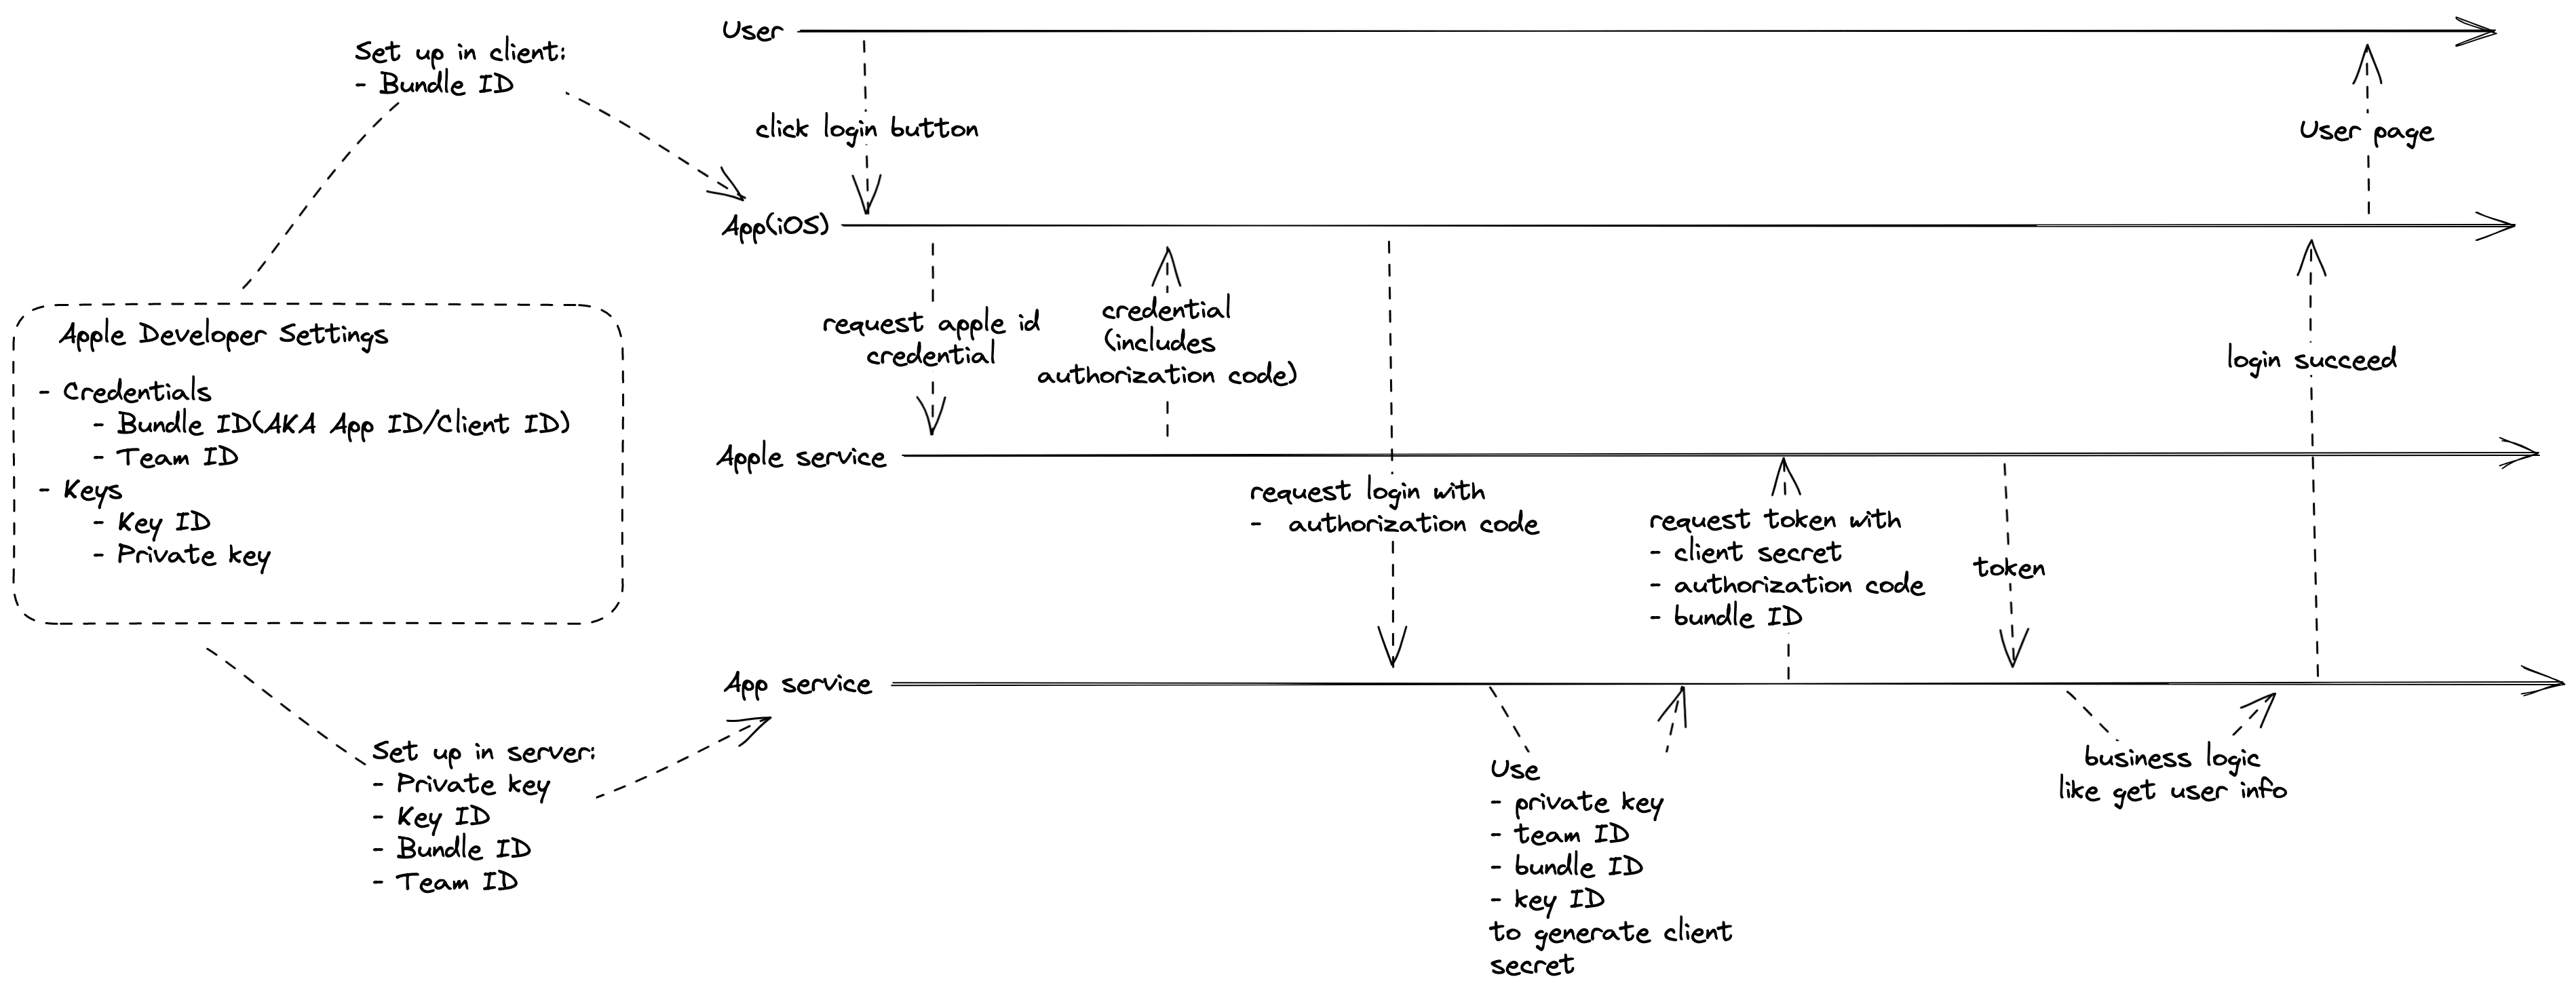
Here I will introduce the Apple login flow in iOS, which is based on the authorization code.
There should be another way to use the identity token and Apple public key to do the same job, but we didn’t put it into practice, so for now I won’t cover it.
Flow
The iOS apple login flow is not bounded with flutter tech (Apple login in Android or Web has more steps than this and is not introduced here).
Used Packages
- Flutter
- sign_in_with_apple. Flutter bridge to Sign in with Apple.
- Node
- apple-signin-auth. Apple sign in for Node.js.
Docs
Steps
1. Settings on the Apple Developer page
A paid apple developer membership account is required for this step!
In this step, we need to setup two things:
- an identifier that configures the App capabilities.
- create a private key.
edit/create Identifier
Visit Certificates, Identifiers & Profiles. Choose “Identifiers“ and create/edit the APP’s identifier. Make sure “Sign in with Apple“ is selected in Capabilities.

After the identifier is created, it will show team ID and bundle ID.
we can also find team ID on account page.
create private key
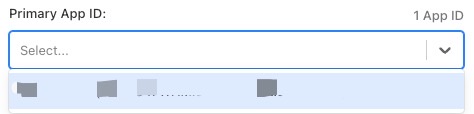
Choose “keys“ and register a new key, also make sure “Sign in with Apple“ is selected.

Then select the Primary app ID as the identifier bundle ID we just edited/selected.
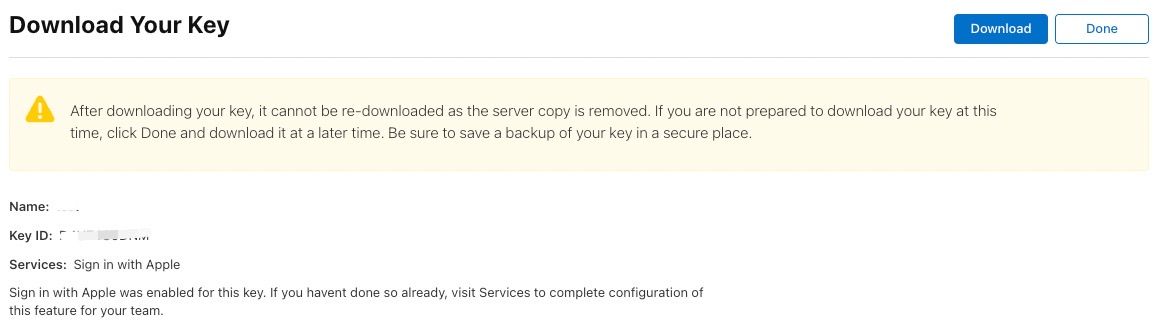
After it’s registered, it will provide a one-time download link to download the private key file.
Also, it has a key ID.
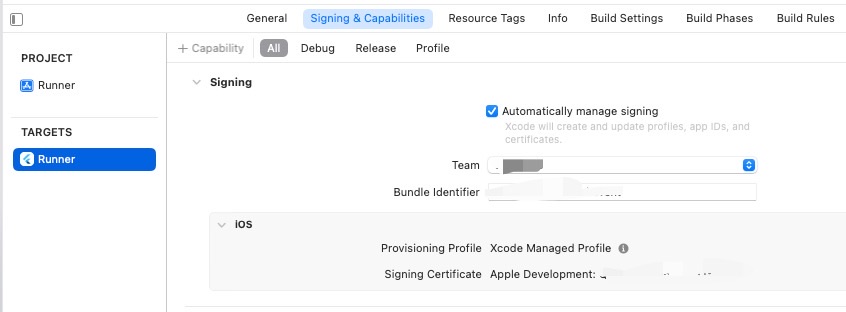
2. Settings in Xcode
Open App project, Select “Target-Runner-Signing & Capabilities“ and add “Sign in with Apple“ Capability.
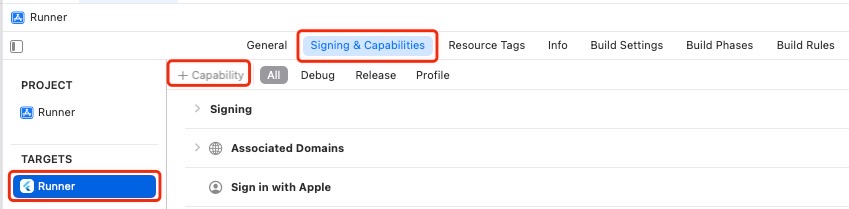
Open “Signing“ tab and select the developer team ID and bundle ID.
3. Logic in the Client side
We are using flutter to build our App, and the package sign_in_with_apple will help integrate with Apple service to get the credential we need. It’s usage is very straightforward so just check the example. And in the end, you will get a credential that contains the authorization code. It will be the key parameter for our App login API.
4. Logic in the App Service side
The APP service will handle most part of the work. We are using node.js and the package apple-signin-auth.
In this step, we only focus on two parts:
- create client secret
- get authorization token
create client secret
Before we can ask Apple service for an authorization token, we need a “client secret“, which is a JWT used for each validation request between our server and apple service. if we check the doc for details, we will see Apple requests the JWT be signed with a specific algorithm. So the apple-signin-auth do us a favor, just use appleSignin.getClientSecret with the right parameters:
const clientSecret = appleSignin.getClientSecret({
  clientID: 'com.company.app', // Apple Client ID, AKA Bundle ID
  teamID: 'teamID', // Apple Developer Team ID.
  privateKey: 'PRIVATE_KEY_STRING', // private key associated with your client ID. -- Or provide a `privateKeyPath` property instead.
  keyIdentifier: 'XXXXXXXXXX', // identifier of the private key. AKA key ID. - can be found here https://developer.apple.com/account/resources/authkeys/list
  // OPTIONAL
  expAfter: 15777000, // Duration after which to expire JWT
});
get authorization token
This part is straightforward. Just call the API and Apple service will return the authorization token. We can check the doc and as always, apple-signin-auth wrapped it as a function to call:
const options = {
  clientID: 'com.company.app', // Apple Client ID, AKA Bundle ID
  redirectUri: 'http://localhost:3000/auth/apple/callback', // We don't need it in our login flow.
  clientSecret: clientSecret
};

try {
  const tokenResponse = await appleSignin.getAuthorizationToken(code, options);
} catch (err) {
  console.error(err);
}
Once our App Service gets the authorization token, we can do our business logic, like getting the user info, which shouldn’t be a problem.
Conclusion
So this is the way to support Apple login based on the authorization code in iOS. Just remember there are other ways and more to set up if you want to support Android or Web.